
Settings Overview
Configure Speakly to your needs
Open Settings with the Settings button at the bottom of the left sidebar. Manage account in the account menu opens the same dialog on its Account tab. The tray menu has no Settings entry.
The dialog lists ten tabs in two groups in its own sidebar, with the app version printed underneath:
- Settings — General, Transcription, Post-Processing, System, Permissions, About
- Account — Account, Statistics, Plans and Billing, Data and Privacy
Sign out is on the Account tab. This page covers General, Transcription, Post-Processing, System, Permissions and Plans and Billing. Statistics and Data and Privacy have their own pages: Statistics and Data and Privacy.
General Settings
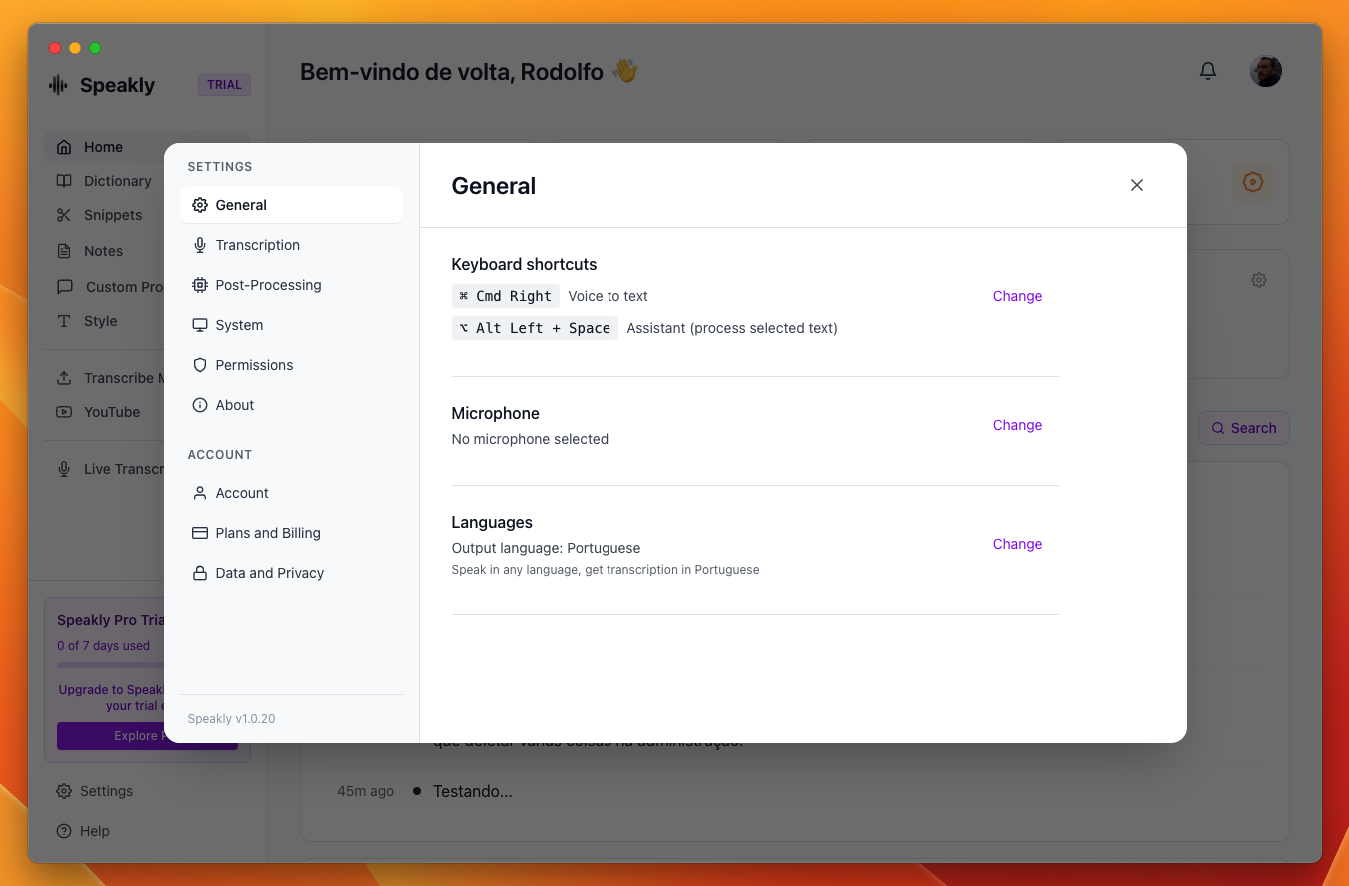
The General tab contains your most frequently used settings:
- Keyboard shortcut — Speakly has exactly one shortcut. The General tab shows its keys next to Recording shortcut, and View opens the editor, which also holds How it behaves. The default is the Right ⌘ key on its own on macOS and Right Ctrl + Enter on Windows and Linux.
- Microphone — the input device in use; Change lists every available device.
- Language — the language you speak; Change opens the picker.
There is no second shortcut for the assistant. Two quick taps on that same shortcut (within 600 ms) open Agent Mode, and only while Enable assistant is on, on the System tab. Only taps count: holding to talk, letting go and holding again is two separate dictations, never a double-tap.
Transcription Settings
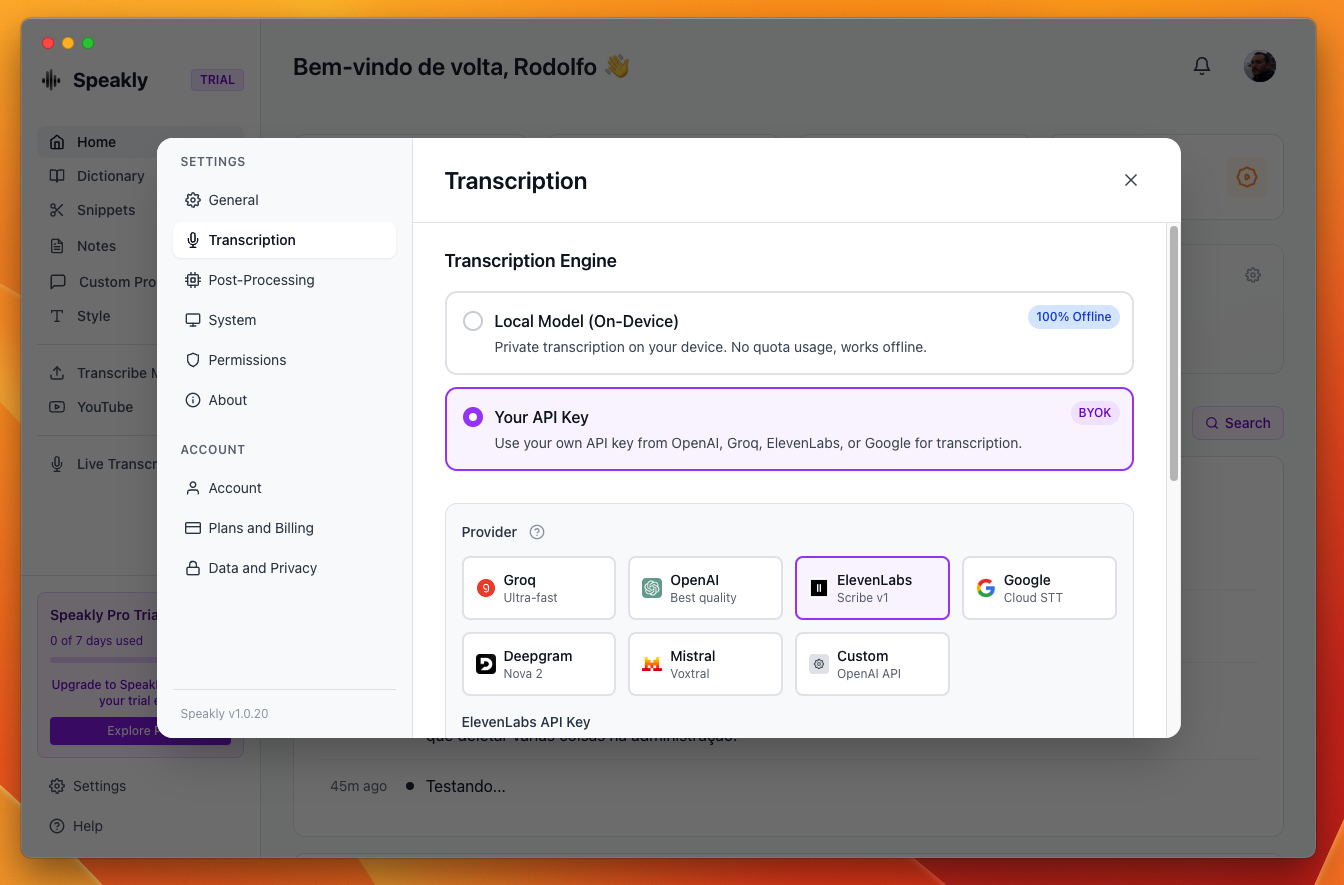
Choose how your audio is transcribed:
Local Model (On-Device)
Uses Whisper running directly on your device. Your audio never leaves your computer. The model runs using your CPU (and optionally GPU if available).
Your API Key (BYOK)
Pick Your API Key under Transcription Engine on the Transcription tab and a Provider grid appears with seven tiles:
- Groq — Ultra-fast
- OpenAI — Best quality
- ElevenLabs — Scribe v1
- Google — Gemini 3.5 Transcribe
- Deepgram — Nova 3
- Mistral — Voxtral
- Custom — OpenAI API, for any endpoint that speaks the OpenAI transcription format
Post-Processing Settings
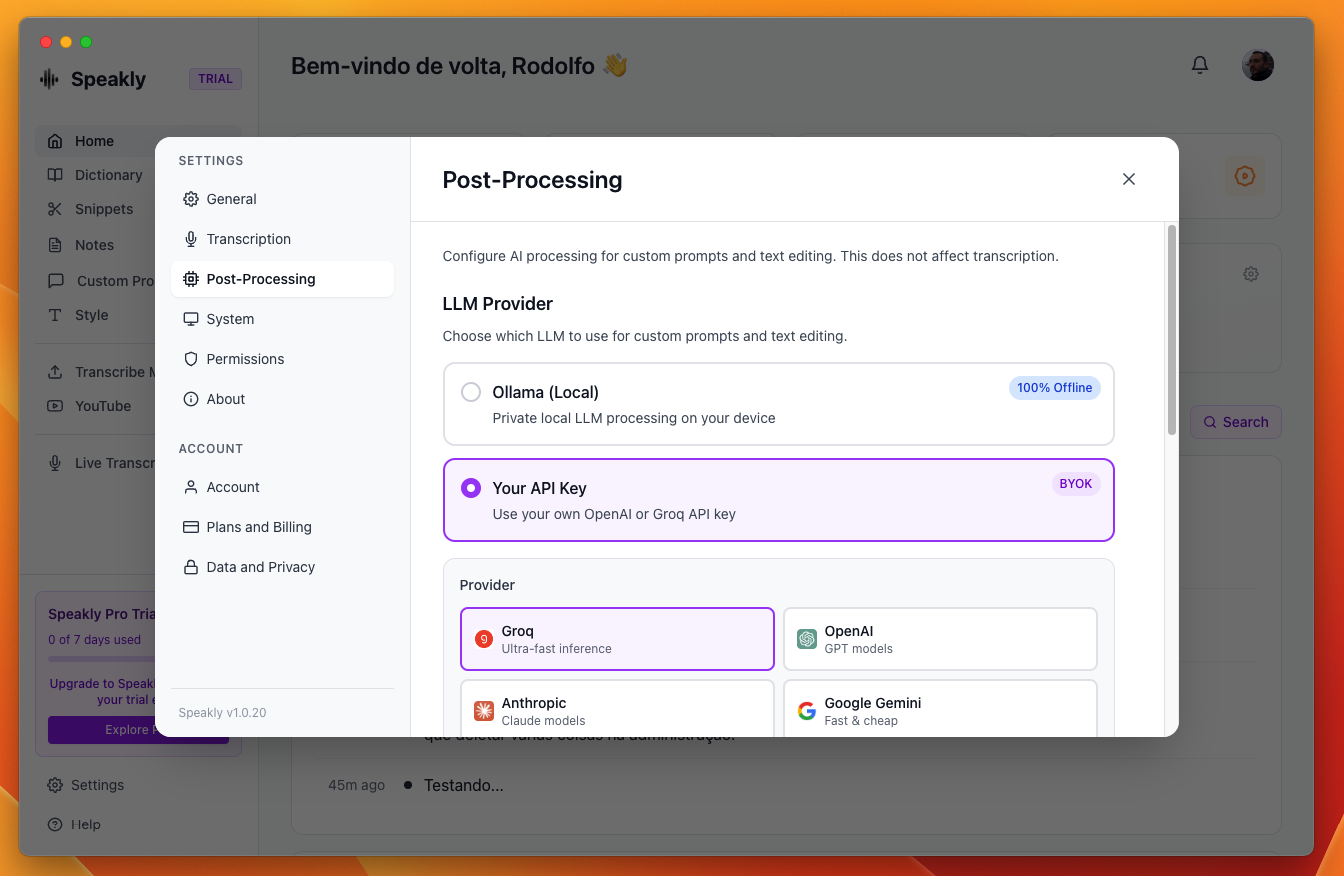
Post-processing uses AI to clean up and format your transcribed text. Options include:
Ollama (Local)
Run local LLMs like Llama, Mistral, or Gemma on your device. Install Ollama separately and pull your preferred model.
BYOK Providers
- Groq — ultra-fast inference
- OpenAI — GPT models
- Anthropic — Claude models
- Google Gemini — fast & cheap
- Mistral — European, GDPR
- OpenRouter — access to 100+ models
- Cerebras — ultra-fast
- Ollama (Local) — runs offline on your machine
Each provider's model list is fetched with your key rather than hardcoded, so new models appear without updating Speakly.
System Settings
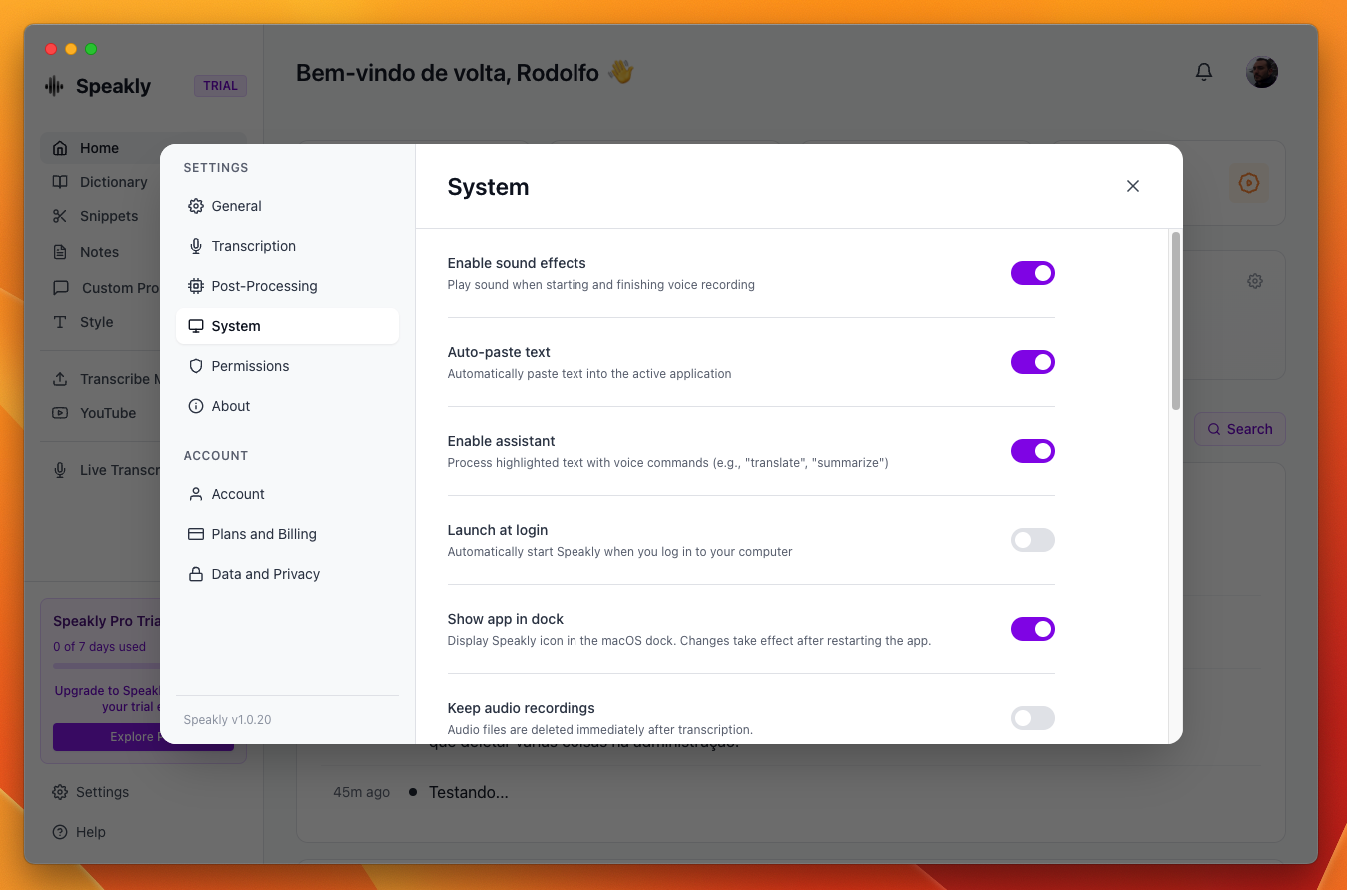
System settings control how Speakly behaves on your computer:
- Enable sound effects — Play sound when starting and finishing voice recording
- Playback when recording — Turn other apps' audio down while you dictate; defaults to Much lower, and Speakly restores the volume you had when the dictation ends, even after a crash mid-recording
- Auto-paste text — Automatically paste text into the active application; off means text is only copied to the clipboard and you paste manually
- Enable assistant — Process highlighted text with voice commands (e.g., "translate", "summarize"); off means voice only transcribes
- Launch at login — Automatically start Speakly when you log in to your computer
- Show app in dock (macOS only) — Display Speakly icon in the macOS dock. Changes take effect after restarting the app.
- Keep audio recordings — off, audio files are deleted immediately after transcription; on, they are kept, which is also what lets you re-transcribe a past dictation from Recent Activity
- Audio acceleration — sends API engines a compact MP3 instead of the raw recording: 2x speed for OpenAI, Groq and Mistral, normal speed for ElevenLabs (faster replies, smaller upload, roughly half the billed audio-minutes, transcript unchanged). Gemini and Deepgram always receive the original — MP3 makes Gemini slower; the local model always hears the original audio
- Redo onboarding — the Redo Setup button resets all configurations and runs the setup again
Recording indicator style
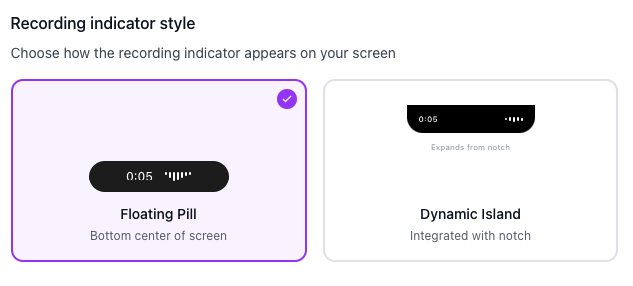
Choose how the recording indicator appears on your screen:
- Floating Pill — “Bottom center of screen”: 340 x 100 px, 25 px above the bottom of the work area.
- Dynamic Island — “Integrated with notch”: 340 x 37 px at the very top of the screen.
This selector is rendered on macOS only. On Windows and Linux the Floating Pill is always used.
Microphone sensitivity
Microphone sensitivity is on the System tab, not on General. The slider runs from 0.5x to 3.0x in steps of 0.5 and defaults to 2.0x, shown as 200%. Test records three seconds and plays it back with the current setting.
Permissions
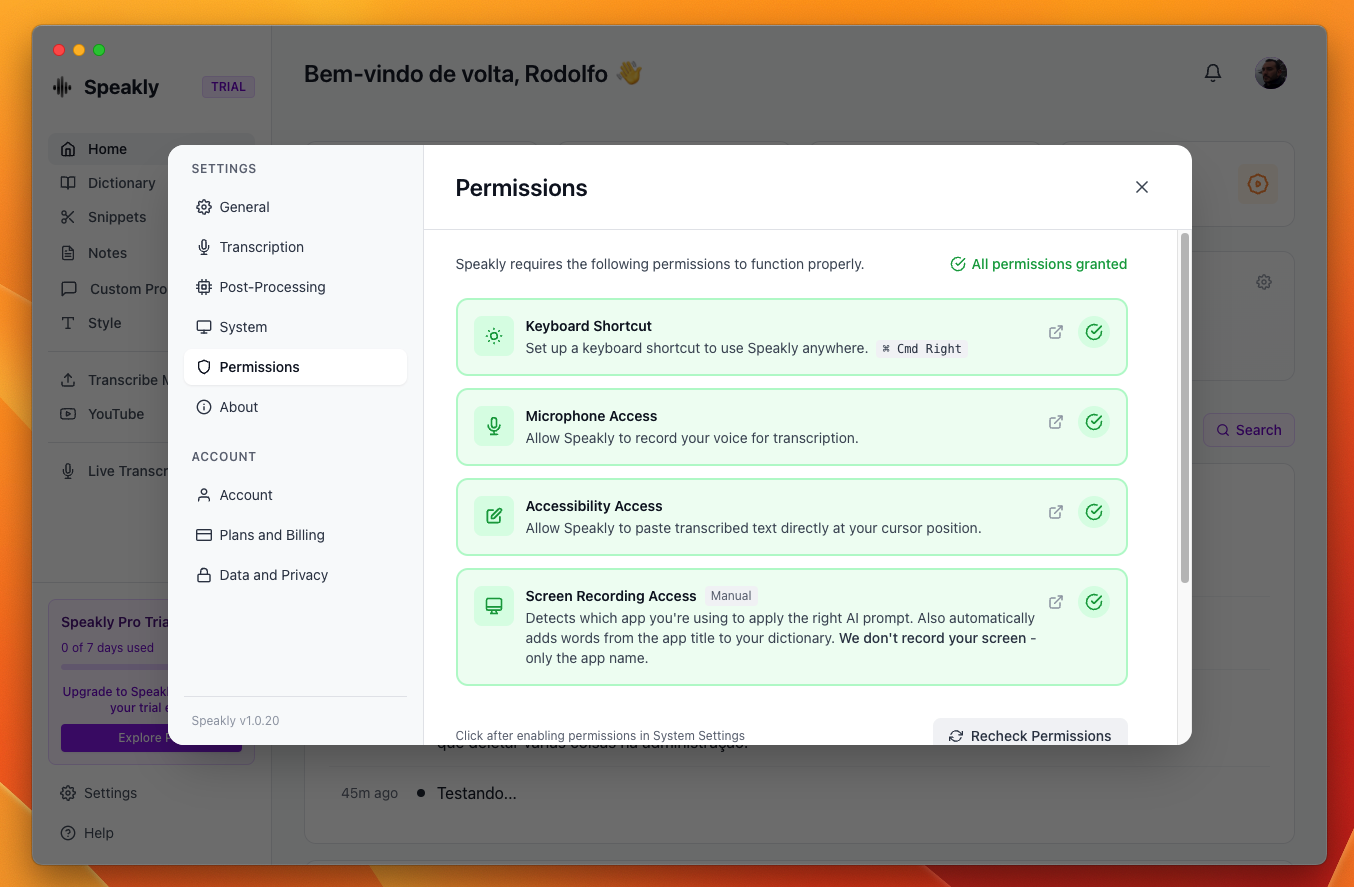
Speakly requires certain permissions to function properly:
- Keyboard: Required for global hotkeys to work from any application
- Microphone: Required to capture audio for transcription
- Accessibility: Required for keyboard capture, auto-paste, and for reading the visible text of the front window when Agent Mode runs or a rule asks for screen context
- Screen Recording: Required for some features (optional)
Plans and Billing
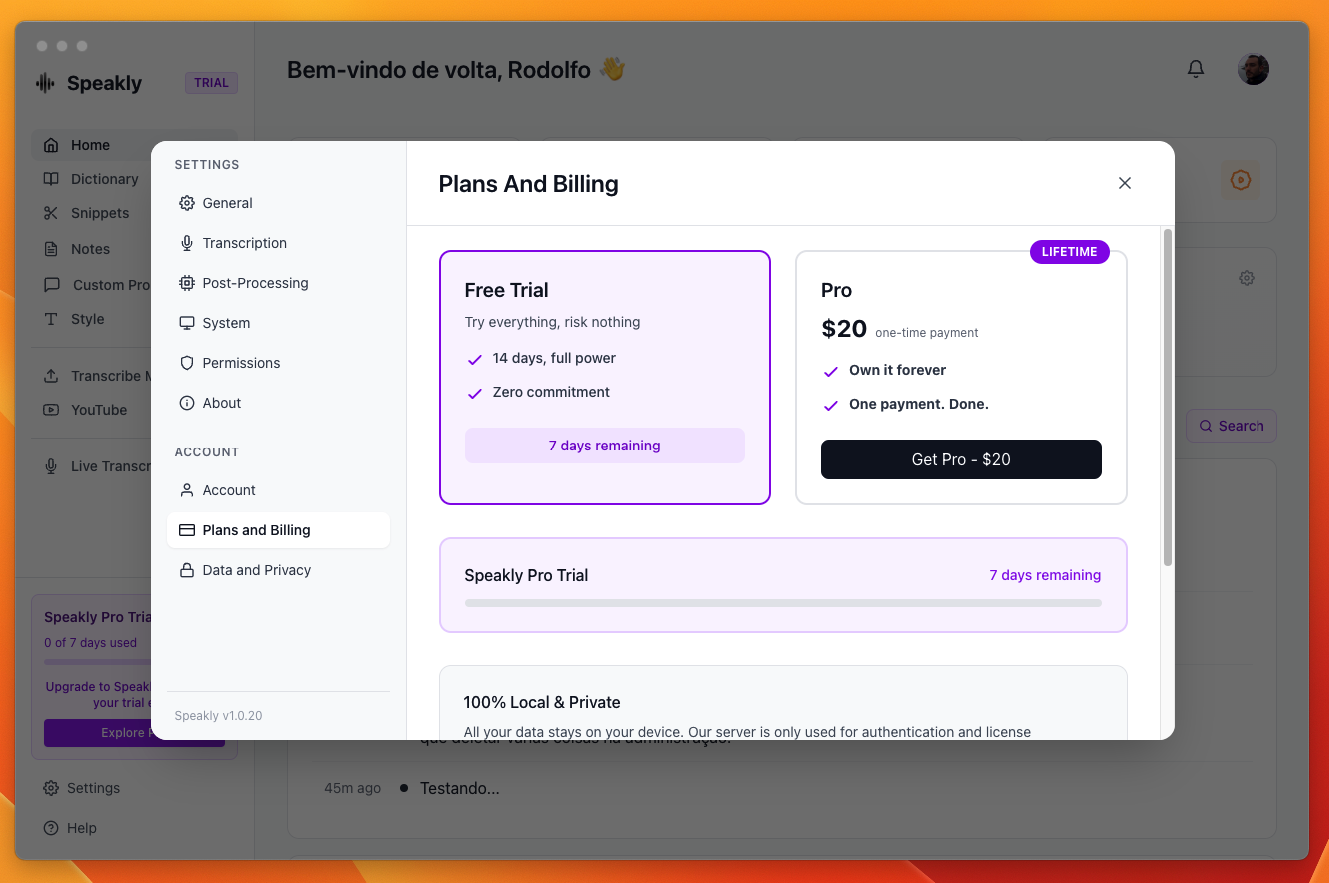
Speakly offers two plans:
- Free Trial: 7 days of full access, no card required
- Pro (LIFETIME badge): $20, one-time payment